Wednesday, February 2, 2011

Initial Assembly testing


After the rush of the holidays and new year I was able to get more time in on the engine.  I did some long block assembly tests to check fit of all the reciprocating parts. All the parts fit properly and go up and down as the crank goes round and round.

Main bearing/conrod journal assembly


The 180 degree crankshaft was chosen to minimize the fluctuations in reflected crankshaft inertia torque.  This is similar to the idea used in Yamaha's M1 GP bike and R1 street bike.  Normal I4s have a flat crank which means that when the outer 2 pistons are at TDC the inner 2 pistons are at BDC.  This results in the reflected torque of the entire piston/conrod assembly varying greatly.  At high engine speeds variation can be up to 20 times the combustion torque.  Because this variation is both positive and negative this variation of course does not add to the engine's output torque. What is does do is overlay a large amplitude noise signal over the small amplitude torque signal, muddying the rider's connection between the throttle and rear tire.  This Youtube video from Yamaha does a good job explaining the difference in the 2 configurations.  At around 2:30 the details of the inertia torque variations are explained.  Yamaha's Furusawa wrote a technical paper analyzing the signal to noise ration of various crank configurations which backs this up.

Where I am departing from the status quo is my choice for a screamer firing order.  I am proposing that the minimized crankshaft inertia torque variations is the real reason that Ducati twins seem so much more driveable than the other I4s in WSB.  Single crankpin vee twins by default have a much better crank inertia situation than the normal I4 because of the piston/cylinder bank angle relationship.  I think the whole 'big bang' theory is rubbish and therefore am trying to get the best of both worlds- low crank torque inertia variation for improved driveability but a screamer firing order for maximum power potential.  There is a small penalty of having to add counterweights to the crank to reduce the rocking moment produced by the 180 degree crank arrangement but I think the benefits will far outweigh the costs.

You can see the details of this in the following 2 pictures:

The front bank cylinders are at TDC and BDC while................


The rear bank cylinders are both at midstroke.   This configuration results in a minimal variation in crank inertial torque and I hope a clean signal from the rider's wrist to the crank.

You can see the interplay of the pistons in this short video:


Next up is checking out the camchain runs and doing a longblock assembly test with the cylinder heads and cams.  Once this is done I can send both crankcase top parts to Millennium Technologies for nikasil plating and final honing.  While the parts are being plated and honed I have plenty of smaller parts to make, various shafts and both engine side covers.

That's all for now.

Wednesday, December 8, 2010

Crankshaft Offset Journal Test Part Machining


We left off on the crankshafts with all the lathe operations being complete and all 4 parts being ready for the 4 axis mill work.

The next operation is to do the offset machining needed for the connecting rod journals.  There are two techniques available: eccentrically mount the crankshaft in a special chuck on the connecting rod axis and turn the journal or mount the crankshaft on the main journals and eccentrically turn the conrod journal.  The first option is easier to program but more difficult to fixture, is very unbalanced during machining, and requires part repositioning for each conrod throw.  The 2nd option is more complicated from a programming perspective but is easier to fixture, is balanced, and needs no part repositioning.  I chose the 2nd option as once the upfront programming work is done making multiples is easy and repeatable.

Due to the low cutting forces due to the aluminum test part material and a desire to get a sample part machined I opted to leave the outboard 4th axis support off.  Machine time these days is limited and getting a sample part quickly was of prime importance.

The mill setup is as shown:

The first operations are simple pocketing to remove the majority of the material in the most efficient machining technique.  Pocketing was done at increments of 90 degrees and ended up with squarish journals.


Here's a short movie of the squared off journals:


Once this stage was complete I moved on to the 2nd program which created the fully round journals.  The video of this move is subtle but cool.  The machine is performing a G3 arc in the YZ plane (G19) while the 4th axis is doing a rotary move from 0 to 360 degrees.  The result is an eccentric true cylindrical surface with none of the approximation concerns usually associated with surface machining type toolpaths.


This is the first journal after its finishing pass.


And this is a short movie of both journals.

The 3 slight ridges on each journal are an artifact of the dished end of the end mill used for the test cut.  For the final steel parts I had a 4 flute finishing end mill specially modified to flatten the end face and keep it center cutting.  It is not suitable for machining aluminum so in the interest of quickly getting a verified program I used a mill with standard aluminum cutting end geometry.

This part is being sent to a grinding house for finishing of the journals so the absolute tolerance and surface finish are not as crucial as long as there is enough stock left to clean up during grinding.  After consulting with the grinder I am leaving .010" of stock on the main journals and .020" on the connecting rod journals as grinding allowance.

Now that I have a sample crankshaft we can test assemble a short block with the major rotating components: crank, conrods, pistons, and also trans and oil pump/drive components.  Once we reach that stage there will be lots of pictures!

That's all for now.

Chris

Tuesday, December 7, 2010

Machining the Torque Plate

I was able to get at Peter's mill for a bit last night and did the machining on the torque plate.  This part is used during the final cylinder honing process to simulate the distortion of the bore caused by the cylinder head bolt forces.  It is useless to create a perfectly circular bore if you are then going to distort it with clamping forces. This procedure creates a more accurate simulation of real world use during the bore process that results in an out of round cylinder when unclamped that shifts to round as it is clamped.  I've heard that extreme tech engines like F1 do the honing process with a torque plate while the block is heated with hot water to even more closely replicate actual operating conditions.  I'll have to see what MT thinks about this one!


The part started with a piece of 1" thick 304 stainless steel plate that was waterjet to a rough profile by North Eastern Water Jet.  Andre of NEWJ is always very helpful in suggesting material they already have in stock to shorten lead time and reduce cost.  The cost of the waterjet cut blank from NEWJ was less than a comparable piece of stock from the local supply house and saved me from having to hog out the majority of the cylinder bore.
The machining of the bores and screw/dowel holes was uneventful.  The part is now nearly finished.  The last issue is that the mill finish on the top of the material is not fine enough to clamp on the head surface without marring the aluminum casting.  To fix this the part needs to be surface ground to a 8 microinch finish.  I'll bring the part to a local vendor, Garden State Precision, who has the equipment and expertise necessary to do the job properly.   I'll drop it off in a day or 2 and since this is not a rush pick it up in a week or 2.


While I am at GSP they will also do another small grinding job, thinning the crescent-shaped crankshaft thrust bearings.
The crank bearings are from a ZX10R.  The journal bearings are to be used unmodified but the thrust bearing is slightly too thick to fit into my crank design.  Instead of having a full-on special made, which is expensive and time consuming, I will have these stock bearings ground from the backside to the appropriate thickness.  Inexpensive and just as effective.  I'll have them grind matched sets in .0005 increments to allow me to dial in the desired crankshaft end float.

Coming up is the crankshaft rod journal machining.  Hopefully in a few days but you know how it goes!


Until next time,
Chris

Monday, November 22, 2010

It's déjà vu all over again


Seems like we were here a couple of months ago!
 
Once all the programming and fixturing is done making multiples is fast!  That's the beauty of sand casting and CNC.  Minimal material removal yet still a complex multifunctional part for a reasonable cost.  The first operation on the 3 new parts ran smoothly.  The crankshaft blanks nests nicely in the journal area.

Now I have to tear down the mill setup and reinstall the trunnion, dial it in, and run the remaining 4 axis programs.  If those run with no problems the two upper crankcase parts will be sent off to Millennium Plating for NSC plating and honing.  I'll send the J&E pistons with the castings so that Millennium can mic the actual pistons and get the piston to wall clearance dead accurate.

One task before plating is to finish machine and surface grind the stainless steel torque plate.  This will be bolted to each individual cylinder bank to simulate the head clamping forces during the final honing process.


When an engine is final assembled and you tighten the head bolts the cylinder walls distort slightly from round.  This is bad for piston ring seal so a the use of a torque plate simulates the distortion of clamping so that the cylinder wall is honed to a round shape in a condition close to actual running conditions.

That's all for now.  Hopefully I'll have the balance of the machining done sometime this week.

Friday, November 19, 2010

Final Casting Stretch

First off, apologies for the extended delay between posts.  This is a project that requires a lot of time which is not always available when trying to run a one man business in a recession!  In addition to client work that takes me away from time that could be better spent on this project I did manage to squeeze in a vacation riding dirt bikes in Moab, UT.  It was an absolute blast and a needed recharge away from the city.

As with everything these days some of the guys in on the trip did a blog site on it at ADV rider forums, appropriately titled 'Manhattan to Moab or City Blocks to Slickrocks'.  We got to ride some amazing terrain that is the antithesis of what I normally ride.  Grip levels on the rock were insane and the Slick Rock trail was like the biggest skateboard park in history.  The pics tell the story well.

Now on to more asphalt-based endeavors........

I received the final revision on the castings from Harmony.  This 1 lower and 2 uppers should be able to be used as parts for the first engine build.  The castings sown in the previous posts were casting samples that needed inspection windows and other machining features to allow verification of the internal features that precluded their use in a running engine assembly.  Now that the molds have been proven out and revised as necessary these parts should be the cases of engine serial number 000001 and the top of 00002.


The overall finish on the parts look excellent and soon more aluminum chips will fly.  Then its on to more crankshaft and primary drive gear machining then more parts then some more......

That's it for now.  Hopefully have another update soon,

Monday, September 27, 2010

Parts is parts

Just posting a few shots of the various parts that are accumulating.  It's nice to start a project like this and have spare parts available to experiment with.  Previous bike and engine projects have been one-offs and that presents a problem when failure is encountered- the need to wait for a replacement custom part, usually the weekend before a race!  Now we'll have the ability to have 2 complete engines plus a host of spare parts.  What luxury!

Most of the parts are produced to my specifications by the indicated vendor, the rest are standard aftermarket performance parts.  Thanks to Barry from Celtic Racing for referring us to Skip Dowling of Orient Express, a great source for all things OEM and aftermarket in the SportBike world.  Skip was able to get us the parts we need at very reasonable prices.  A shout also goes out to Fred Renz of Yoyodyne, a great resource for hard to get exotic parts and just about anything Brembo manufacturers, even the true GP equipment.


Castings:  a lot has been said about these parts and the great job Harmony/TPI is doing so I'll leave it at that.

Chassis Castings:  great parts from Harmony/TPI here too.

J&E Pistons:  producer of top quality pistons for motorsports.  These are a high compression version of their ZX6-R product.

Carrillo connecting rods:  What is there to say?  If you want the best rod, you buy a Carrillo.

Oil pump gerotor and custom drive gears:  fron Melling and SDP-SI, respectively.

Tungsten crank counterweights:  From Midwest Tungsten Service.  These bolt on counterweights that nest inside the con rod I beam area help keep crank and overall engine cases as narrow as possible.

Brembo front brake calipers and master cylinder from Yoyodyne:  Again, if you want the best, you get Brembo.

Ohlins TTX front damper from Motorsports Spares, who usually deal with 4 wheel vehicles, but had the knowledge of the generic Ohlins components to help us source a suitable solution for our front spring/damping needs.

Cometic gaskets:

Lots of misc bolts, seals, bearings, etc.

More misc parts, mostly from Orient Express:


I'm starting to amass quite a collection of parts.  Soon this chaotic jumble of parts will defy entropy and assemble into an organized machine capable of scorching the track.

That's all for now.

Flip-Flopping the Crankshaft

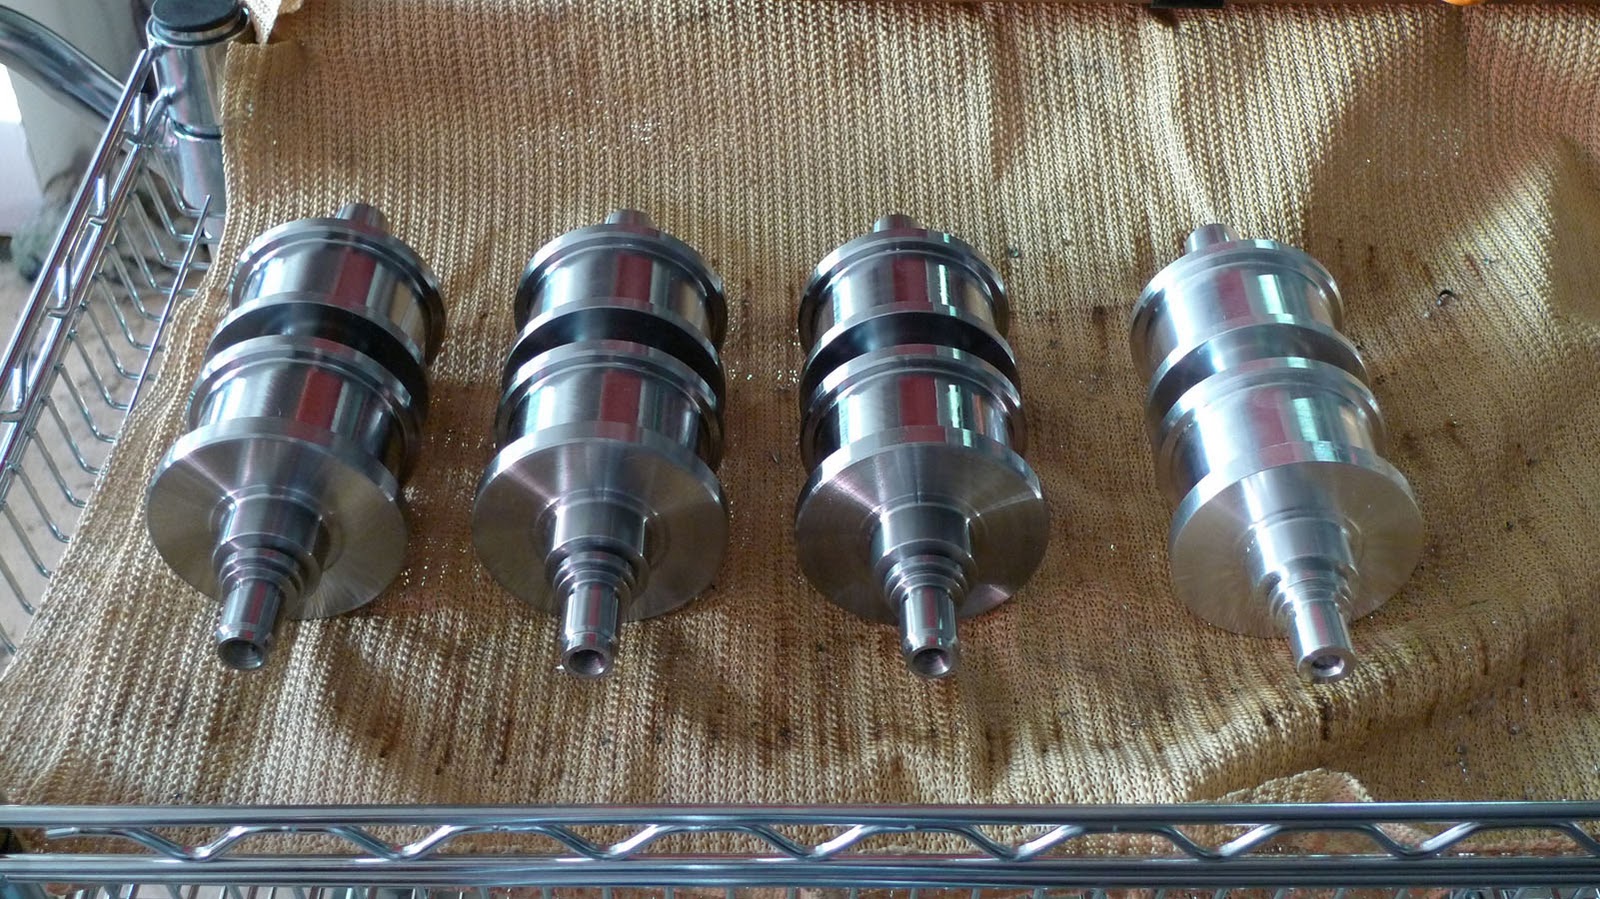
We've made good progress on the crank so far, one aluminum test part and 3 final steel parts all have the first lathe operation complete with no crashes, broken tools, or other mishaps.


Now we remove the 3 jaw chuck front he lathe and replace it with a 16C collet nose. The collet nose will allow us to hold the part very accurately from a previously machined feature.  We'll then indicate the length of the part and run the second lathe operation.  This operation creates the features for the generator main bearing journal, the front bank cam drive, and the tapered stator mount.


3 jaw chuck in first lathe operation:

16C collet nose for second operation:

Now just a few button presses and the 2nd operation is finished:

Repeatedly running the program finishes out the parts for now:


Now we are finished with the lathe work.  Next up will be putting the parts in the 4th axis on the mill and creating the 2 sets of offset throws for the connecting rods and the sprocket teeth for the cam chain drives.  once those features are complete I'll put the part up on a manual mill and drill and deburr the main and rod bearing oil holes.  Unfortunately, that will need to wait a week or so for some client work on the mill to be finished.